
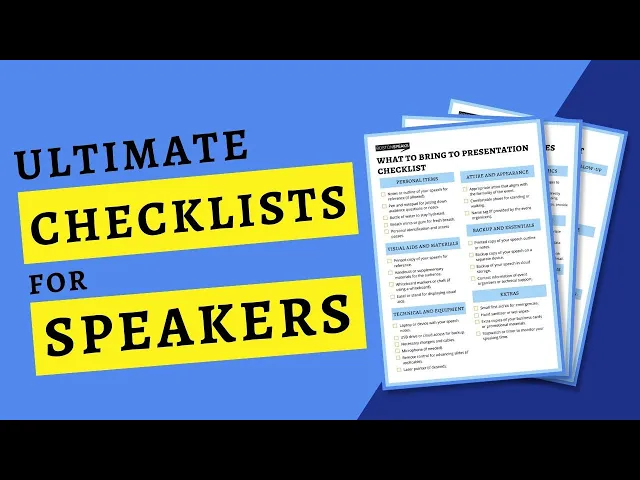

Pre-Presentation Checklist: 12 Must-Do Items
Want to ace your next presentation? It all comes down to preparation. Here's a quick rundown of the 12 must-do steps to ensure you’re ready to deliver with confidence:
Polish Your Slide Deck: Ensure design consistency, proofread for errors, and use clean visuals.
Align Content with Goals: Focus on your main message and organize slides logically.
Know Your Audience: Research their needs, use relatable examples, and avoid alienating language.
Practice Delivery: Time yourself, refine pacing, and record to improve.
Test Equipment: Check venue tech, bring backups, and ensure all devices work.
Confirm Venue Details: Double-check time, location, and logistics like parking.
Engage the Audience: Add polls, Q&A, or exercises to keep them involved.
Dress Professionally: Match or slightly exceed the audience’s dress code.
Manage Nerves: Use breathing techniques, mindfulness, and visualization.
Have Backups: Save files in multiple formats and bring extra equipment.
Organize Materials: Prepare handouts and ensure they’re error-free.
Arrive Early: Give yourself time to settle and resolve last-minute issues.
Preparation is everything. When you cover these steps, you’ll walk into any presentation ready to impress, engage, and deliver your message effectively.
Checklist To Design The Perfect (Presentation/Workshop/Training/Meeting)
1. Complete and Review Your Slide Deck
Your slide deck is the visual foundation of your presentation, and it should be polished to perfection. A strong deck doesn't just complement your message - it amplifies it. Before stepping onto the stage, ensure every slide looks professional, aligns with your brand, and communicates your ideas effectively. Start by focusing on design consistency and branding.
Review Consistency and Branding
Did you know that consistent branding can boost recognition by up to 80%? That’s why it’s crucial to ensure your slides maintain a cohesive look. Take a fresh look at your deck and confirm that elements like color schemes, fonts, and layouts are uniform. Use PowerPoint’s Slide Master feature to streamline this process - it lets you apply consistent backgrounds, logos, fonts, and page numbers across all slides automatically.
If your Slide Master isn’t set up yet, gather your brand essentials: color palettes, fonts, logos, and icons. Establish clear text zones and formatting rules for headings, body text, and bullet points. Stick to two or three complementary fonts - one for headings and another for body text - to maintain a clean, professional appearance. And if your company has recently updated its branding, make sure your PowerPoint templates reflect the new visual identity.
Proofread for Errors
Nothing undermines a presentation faster than typos or errors. Carefully review every slide for spelling mistakes, grammatical issues, or incorrect data. Reading your slides aloud can help catch mistakes you might otherwise miss. Better yet, ask a colleague to give your deck a second set of eyes, paying close attention to titles, bullet points, and chart labels - these are common hiding spots for errors. For slides featuring data, double-check that percentages, dates, and statistics match your source materials.
Clean Up Visuals and Animations
When it comes to visuals, simplicity is key. Make sure your charts, graphs, and images enhance your message rather than overpowering it. Remove any visuals that don’t directly support your points. Test animations and transitions to ensure they guide the audience’s attention without becoming distracting.
High-quality visuals are non-negotiable - pixelated or stretched images can make your presentation look unpolished. Use high-resolution images and check that they’re properly scaled. Also, verify that your slides have good color contrast so text remains easy to read, even in varying lighting conditions or with different projection systems. A clean, clear deck keeps your audience focused on what matters most: your message.
2. Match Content with Presentation Goals
Just like maintaining consistency in your slide design, aligning your content with your presentation's goals is non-negotiable. Every element - text, visuals, or data - should work together to support your central purpose. Without this alignment, even the most polished slides can confuse your audience. The next step is to refine your slides so they consistently reinforce your main message.
Define Your Main Message
Boil down the purpose of your presentation into one clear, memorable sentence. This sentence will serve as your compass, helping you decide what to include and what to cut. Whether your goal is to inform, persuade, entertain, or inspire, this main message should encapsulate exactly what you want your audience to take away.
To sharpen your focus, try using the SMART framework (Specific, Measurable, Achievable, Relevant, Time-bound). For example, instead of a vague goal like "improve our processes", aim for something more concrete: "reduce project completion time by 15% within three months through our new workflow system."
Once your main message is clear, make sure every slide supports it. If a slide doesn’t contribute directly to your core idea, it’s better to leave it out. For instance, if your message is about boosting customer retention, slides about your company’s history should only stay if they directly tie into retention strategies. Remember, your audience’s attention is limited - don’t waste it on distractions.
This clarity naturally leads to the next step: organizing your slides in a logical order.
Order Slides Logically
Think of your presentation as a story with a clear beginning, middle, and end. Start by introducing the problem or opportunity, then build your case with evidence and examples, and finally, end with a compelling call to action or summary.
Arrange your slides so they create a seamless narrative. Each slide should naturally lead to the next, helping your audience follow your argument without confusion. For example, a sales pitch might flow like this: Problem → Solution → Benefits → Case Study → Call to Action. This structure ensures your audience understands your reasoning step by step.
Rehearsing your presentation can help you identify weak transitions or gaps in logic. If moving between two slides feels awkward, it’s a sign the order might need tweaking. Smooth transitions act like bridges, connecting different parts of your presentation and showing how everything ties back to your main message.
Finally, think about the questions your audience might have at each stage of your presentation. Anticipating their needs will help you create a structure that feels intuitive and satisfying, leaving them with a clear understanding of your message.
3. Customize Your Presentation for the Audience
The success of a presentation often hinges on how well you connect with your audience. To make an impact, you need to shape your content around their needs and expectations. This means aligning your material with your goals while ensuring every detail resonates with the people in the room.
Research Your Audience
Before you even think about finalizing your slides, take time to understand your audience. Start with the basics: their professional roles, level of experience, and what they hope to gain from your presentation.
This research helps you decide what to include - and just as importantly, what to leave out. For example, a presentation filled with technical terms might work for engineers but could alienate marketing professionals. On the other hand, casual language that clicks with a startup team might not sit well with senior executives.
If your audience is diverse or international, dig into cultural differences. Things like eye contact, personal space, or humor can vary widely across cultures, and what feels confident in one setting might come off as aggressive in another.
Consider reaching out to a few attendees beforehand. A quick chat can reveal their challenges, preferred communication styles, or even sensitive topics to avoid. This personal touch not only helps you adapt your content but also gives you a sense of how familiar they are with your subject, allowing you to adjust the complexity of your presentation.
With this understanding, you can craft examples and stories that will truly resonate.
Include Relevant Examples
Examples bring your presentation to life, especially when they’re tailored to your audience’s world. Case studies, relatable stories, or data points can turn abstract ideas into something tangible and actionable.
Industry-specific examples are particularly effective. If you’re speaking to healthcare professionals, use medical scenarios rather than retail analogies. A manufacturing audience will connect better with production-related examples, while tech teams will appreciate stories about software development. Tailoring your examples this way ensures your message sticks with your audience long after the presentation ends.
Local references can also be a powerful tool. Mentioning well-known companies, landmarks, or events shows that you’ve done your homework and care about their context. Just make sure these references are accurate and up-to-date - outdated information can hurt your credibility.
For diverse audiences, universal examples work best. Visual aids like photos, charts, and graphs can help bridge language barriers and make complex points easier to grasp. Numbers and visuals often communicate more effectively than words, especially when language differences come into play.
Be mindful of the language you use in your examples. Avoid slang, jargon, or idioms that might confuse international attendees. For instance, sports analogies familiar to American audiences might not resonate with people from other regions. Stick to clear, straightforward language that everyone can follow.
Also, keep in mind that some people may understand spoken English better than written text. If your slides include written examples, keep them simple and reinforce them with verbal explanations. This dual approach ensures your message reaches everyone, no matter their level of language comfort.
4. Practice Your Delivery
Rehearsing your presentation is the bridge between preparation and a confident, engaging delivery. How you present - your pace, tone, and overall presence - can determine whether your audience stays focused or tunes out.
Practice helps you smooth out transitions, identify any rough spots, and develop a natural rhythm. It also reinforces your familiarity with the material, boosting your confidence when it’s time to present. The more you rehearse, the more seamless your delivery will feel.
Time Your Presentation and Fine-Tune Your Pacing
Timing matters. Running over your allotted time can frustrate your audience, while finishing too early might leave them feeling shortchanged. Striking the right balance ensures you cover all your points without rushing or dragging.
Start by timing your full presentation from start to finish. Use a stopwatch or your phone’s timer, and rehearse at the pace you plan to use during the actual event. Keep in mind that nerves can cause you to speed up, so build in a 10–15% buffer to avoid running over on the big day.
Pay attention to how time is distributed across your sections. Give the most time to your main points - the core of your message - while keeping supporting details concise. Adjust your pacing to match the content: slow down for complex ideas to ensure clarity, and speed up slightly when covering familiar or less critical material. If your presentation is set for 20 minutes, aim to finish your practice runs in about 18 minutes. This leaves room for natural pauses and any audience interaction.
Don’t forget about the tone and rhythm of your delivery. A monotone voice can lose an audience, no matter how compelling your content is. Vary your speed to emphasize key points - slow down for critical information and pick up the pace during transitions or background details. These changes keep your delivery dynamic and engaging.
Record and Review Yourself
Recording your practice sessions is one of the best ways to refine your presentation skills. You don’t need fancy equipment - a smartphone camera works just fine.
Place your recording device at audience eye level, about 6–8 feet away, to mimic their perspective. Record your entire presentation, including your opening, main content, and closing remarks.
When reviewing the recording, go through it twice. On your first pass, focus on your verbal delivery. Are you using filler words like "um", "uh", or "you know"? Is your speech clear and easy to follow? Check if your tone conveys energy and enthusiasm or if it comes across as flat and disengaged.
During your second review, study your body language. Are you making eye contact and standing confidently? Do your gestures enhance your message or distract from it? Take note of your posture - are you standing tall or slouching? Watch for habits like swaying, pacing too much, or repeating the same hand movements.
Pay close attention to moments where you seem unsure or lose your train of thought. These are often signs that a section needs better organization or more practice. Mark these spots and focus your efforts on improving those areas during your next rehearsal.
5. Test and Set Up Technical Equipment
As you finalize your preparation, don’t overlook your technical setup - it’s crucial to keeping your presentation on track. Technical hiccups can derail even the most well-prepared speaker, but with proper testing and backups, you can avoid unnecessary stress. Think of it as setting the stage for a smooth experience, ensuring the tech works seamlessly alongside your content.
Test Venue Equipment
Make it a priority to arrive at least 30 minutes early to test the equipment you'll be using. This gives you a buffer to troubleshoot or adapt if something isn’t functioning as expected.
Start by checking the projector or display screen. Connect your laptop and confirm your slides appear as intended. Watch out for issues like cut-off text, distorted colors, or incorrect resolution. If your slides seem stretched or squished, you may need to adjust their dimensions to match the screen’s aspect ratio.
Next, test the audio system by playing a sample clip. Walk around the room to ensure the sound is clear and evenly distributed. Even if you think your voice is loud enough, test the microphone - it helps project your voice and ensures everyone in the audience can hear you clearly.
Check your laptop’s power setup. Locate nearby outlets and confirm your charger works properly. A fully charged battery might not last through a multimedia-heavy presentation, so having access to power is essential.
Take a moment to familiarize yourself with the lighting controls. Adjust the lights to highlight your slides without making the room too dark. A good rule of thumb is to dim the lights to about 70% - enough for the slides to pop while keeping you visible to the audience.
If you’re using a remote control or presentation clicker, test its range and reliability. Walk around the room to ensure it advances slides smoothly. If it has a laser pointer, practice using it sparingly for emphasis rather than overusing it.
Create Backup Copies
Always have multiple backups of your presentation to avoid last-minute panic. Save your presentation in several locations and formats - email, USB, and cloud storage. Test each backup to ensure it works flawlessly.
Email yourself a copy with a clear subject line like "Presentation Backup - [Date]." This ensures you can access it anywhere with internet access.
Store the presentation on a USB drive in both PowerPoint and PDF formats. The PowerPoint file preserves animations and transitions, while the PDF acts as a reliable fallback that works on any device.
Upload your presentation to cloud storage platforms like Google Drive, Dropbox, or OneDrive. Generate a shareable link so you can quickly download it if needed.
For extra security, print key slides or create note cards with your main points. These low-tech backups ensure you can still deliver your message if all electronic options fail.
Finally, pack essential cables and adapters, such as an HDMI cable, a USB-C to HDMI adapter, and a USB extension cord. Venues often use different connection types, and having your own gear eliminates compatibility headaches. Before the big day, test all backups on a different computer to verify that fonts, images, and formatting display correctly - especially if you’ve used custom fonts that might not be installed on other devices.
6. Verify Venue Details and Logistics
Getting the venue details wrong can throw off your entire presentation. Spending a few minutes to double-check everything ensures you show up prepared, confident, and ready to deliver. This step is just as important as reviewing your slides or testing your tech setup.
Confirm Time and Location
Logistical missteps can lead to unnecessary stress. To avoid surprises, contact your point of reference 24-48 hours before your presentation. This gives you a chance to catch any last-minute updates that might not have been communicated otherwise.
Make sure to confirm the exact date and time of your presentation. For instance, is it scheduled for 2:00 PM or 2:00 AM on 10/15/2025? Time zone or AM/PM errors happen more often than you'd think, so double-check these details.
Get the full address with specific details like suite or room numbers. Don’t rely on a general building address - corporate campuses and conference centers often have multiple buildings and rooms. Write down specifics such as "Building C, Room 205" or "West Wing, Boardroom B."
Check for any building access rules. Some places might require visitor badges, security clearance, or pre-registration. Corporate offices may have front desk check-ins, while hotels might require access cards. Also, find out if there are restrictions for weekend or after-hours entry that could affect your setup time.
Lastly, confirm the presentation length and format. Are you speaking for 30 minutes or 45? Does that include time for Q&A? Knowing this in advance helps you pace your presentation and stay within your allocated time slot.
Plan Travel and Parking
Once you’ve nailed down the venue details, make sure your travel plans are just as solid. Calculate your travel time and add a 50% buffer. For example, if your commute usually takes 20 minutes, plan for at least 30. This extra time accounts for things like traffic, construction, or unexpected delays.
Look into parking options ahead of time, especially if the venue is in a busy area like a downtown office or a college campus. Parking might cost $15-25, so have cash or download relevant parking apps. Some places offer validation, while others may have time limits that could complicate your schedule.
If you’re using public transportation, check the schedules, note backup routes, and know the nearest stop and how far it is from the venue. Apps can help you track delays or changes to your route.
Don’t forget to check the weather forecast before heading out. Rain, snow, or extreme heat can affect your travel time and even your appearance when you arrive. Pack an umbrella and give yourself extra time if the weather looks tricky.
For out-of-town presentations, it’s a good idea to scout the location the day before. Walk or drive the route, figure out where to park, and pinpoint the building entrance. This quick prep work can save you a lot of stress on the big day.
Lastly, save key phone numbers in your phone. This includes the venue’s main line, your contact person’s direct number, and any parking services. These numbers will come in handy if you run into any issues or delays. Once your venue and travel plans are locked in, you’ll be free to focus on delivering a great presentation.
7. Plan for Audience Interaction
A presentation without audience engagement can feel flat and one-sided. What sets a good presentation apart from a truly memorable one is the connection you establish with your audience. Incorporating interactive elements not only keeps the energy alive but also demonstrates your preparation and ability to manage the room effectively.
Add Interactive Elements
Interactive tools like polls, short surveys, and small group discussions can turn passive listeners into active participants. The approach you choose will depend on your audience size and the setting.
Polls and quick surveys are versatile and work for audiences of any size. For instance, you could ask, "How many of you have faced this challenge before?" or "Who has tried this method?" For virtual settings, platforms like Zoom or Microsoft Teams offer built-in polling features that let you display real-time results, adding an extra layer of engagement.
Pausing for questions throughout your presentation is another effective way to keep your audience involved. Instead of waiting until the end, try saying, "Before we move on, what questions do you have about this topic?" This approach creates a natural break and gives people a chance to process what they've just heard.
Interactive exercises can be particularly useful during longer presentations. For example, ask attendees to discuss a question with a neighbor for a couple of minutes and then invite a few pairs to share their thoughts. This works best in groups of 20 to 50 people, where a bit of movement and conversation won't disrupt the flow.
For smaller groups, such as those under 15 people, you could invite individuals to share quick examples from their own experiences. This not only personalizes your presentation but also helps you gauge how well your points are resonating. To stay on track, set clear limits - 30 to 60 seconds per person - to maintain momentum.
Encourage visual engagement as well. Simple actions like raising hands or standing up can keep the audience alert and add energy to the room.
Finally, time management is key. Interactive activities often take more time than anticipated, so plan accordingly. For a 30-minute presentation, allocate about 5 to 7 minutes for interaction to ensure you stay within your time frame.
8. Check Your Appearance and Materials
Your appearance and the materials you bring play a big role in shaping the first impression - often even before you say a word. Nailing these details shows respect for your audience and helps establish credibility from the moment you walk into the room.
Dress Professionally
What you wear can set the tone for your entire presentation. Your outfit should complement your message, not distract from it.
"Always dress as well as or slightly better than your audience." – Speak Simple
Take time to understand your audience's typical dress code and aim to dress slightly above their standard. If you're unsure, the event coordinator can provide helpful guidance. Your attire should align with your personal brand, industry norms, and company culture, while also making you feel confident and comfortable. Choose clothing that allows for easy movement and maintains a neat appearance, even when you're seated.
To simplify your choices, you might organize your wardrobe into categories like Business Formal or Business Casual. If you're trying out a new look or adding unfamiliar accessories, a quick dress rehearsal can ensure everything works together seamlessly.
While your appearance sets the tone, well-prepared materials solidify your professional image.
Organize Handouts
If you’re providing handouts or using digital aids, confirm the number of copies needed with the event coordinator before printing. Make sure to review all materials carefully for any errors.
9. Control Your Nerves and Mindset
Even seasoned presenters feel a wave of nerves before stepping onto the stage. The goal isn’t to erase anxiety but to manage it effectively, so you can speak with clarity and confidence.
Use Relaxation Techniques
A great way to calm your nerves is through the 4-7-8 breathing technique. Here’s how it works: place the tip of your tongue on the roof of your mouth just behind your front teeth, inhale through your nose for a count of four, hold your breath for seven seconds, and then exhale slowly through your mouth for a count of eight. Janice Tomich notes that practicing this regularly can transform nervous energy into a state of calm readiness.
Mindfulness can also help. When anxiety starts to build, pause and notice where you feel it in your body - perhaps in your stomach or chest. Acknowledge the sensation by labeling it, like saying to yourself, “I feel anxious,” and let it pass without judgment.
Visualization is another powerful tool. Close your eyes and picture yourself delivering your presentation with confidence. Imagine walking onto the stage, greeting your audience warmly, and connecting with them as you speak.
For physical tension, try progressive muscle relaxation. Start at your toes and work your way up, tensing and then relaxing each muscle group. This technique can help reduce symptoms like shaky hands or a clenched jaw.
Finally, establish a pre-speech routine to signal your brain that it’s showtime. This could include deep breathing, a short mindfulness session, or repeating positive affirmations. As one source puts it:
"While relaxation techniques for public speaking (think breathwork or grounding) don't erase fear, they can steady you enough to move through it."
When your mind feels centered, you’ll be better equipped to handle pre-presentation jitters.
Arrive Early
Arriving 30–45 minutes early gives you time to settle in and adjust to the venue. Use this buffer to review your opening lines, practice a breathing exercise, or do a quick visualization. These moments of preparation can help calm your nerves and focus your thoughts. And remember, small mistakes are part of being human. If your mind wanders during your presentation, gently guide your focus back to your message.
10. Check Your Backup Plans
Technology has a knack for failing when you least expect it. Even the most meticulously prepared presentations can be derailed by unexpected glitches - file corruption, equipment issues, or software crashes. Having reliable backup plans in place can turn what could be a disaster into a minor inconvenience.
Save Backup Files
Once you've done your technical checks, make sure your presentation is safeguarded against unexpected failures. Save your file in multiple formats and store it across different devices and platforms. At a minimum, keep your presentation in three formats: the original PowerPoint file (.pptx), a PDF version, and a Google Slides copy stored in the cloud.
The PDF version is your ultimate fallback. Unlike PowerPoint files, PDFs maintain consistent formatting across devices and operating systems. Fonts won't change, animations won't glitch, and your layout will remain intact. While you lose interactive elements, the content and visuals stay exactly as you designed them.
Store these files in several locations. Keep copies on your laptop, in cloud storage, and email one to yourself. For extra security, carry a USB drive with all versions of the file.
When using cloud storage, create a folder specifically for your presentation and use clear naming conventions. Include details like the date and version number in file names - something like "Q4_Sales_Presentation_10-09-2025_v3.pptx." This way, you can quickly locate the correct file even under pressure.
Test all your backups on different devices beforehand. A backup that doesn’t function when you need it is no backup at all.
Pack Backup Equipment
File backups are essential, but don't overlook the importance of having backup hardware. Equip yourself with the tools needed to handle potential equipment hiccups.
Start with an extra laptop charger - nothing derails a presentation faster than a dead battery. If possible, bring a charger that works with multiple devices for added flexibility.
Pack a spare presentation clicker and extra batteries. These small devices fail more often than you'd think, and scrambling to use your laptop's trackpad mid-presentation is far from ideal.
Adapters and connectors are another must-have. Bring an HDMI adapter, a USB-C to HDMI converter, and even a VGA adapter if you're presenting in a venue with older equipment. Many conference rooms rely on outdated projection systems, and having the right adapter can save the day.
If your presentation is particularly critical, consider carrying a backup device like another laptop or a tablet with the presentation preloaded. While carrying an extra laptop might not always be practical, a tablet can serve as a lightweight emergency option.
Don’t forget extension cords and power strips. A laptop dying mid-presentation because the nearest outlet is too far away is an avoidable headache. These simple tools can make a big difference.
Finally, prepare a physical handout as your last line of defense. Print out key slides or talking points so you can still deliver your message even if all the technology fails. It’s an old-school solution, but one that works when everything else doesn’t.
Keep all your backup gear organized in a dedicated bag or compartment. Clearly label your cables and adapters, and check your inventory before heading to your presentation. These small preparations can ensure that even if technology lets you down, you’ll still be ready to shine.
Conclusion: Present with Confidence
Walk into your next presentation ready to shine with this checklist in hand. Thorough preparation is the cornerstone of a successful presentation - it not only ensures smooth delivery but also shifts your mindset, making public speaking a more confident and rewarding experience. When you’ve covered every detail - from aligning your slides to having backup equipment - you can fully focus on what truly matters: connecting with your audience and delivering your message effectively.
The power of preparation goes beyond just avoiding minor hiccups. According to research from the University of Wolverhampton, audiences retain 63% more information when presentations are well-structured and rehearsed compared to those that aren't. This isn't just about skipping over technical issues or awkward silences; it’s about crafting an experience that sticks with your audience long after the presentation ends.
When you're well-prepared, nervous energy transforms into something productive. Instead of worrying about potential mistakes, you can channel that energy into engaging with your audience and leaving a lasting impression. A Prezi survey found that 70% of professionals consider presentation skills essential for career success, proving that every moment spent preparing is an investment in your growth and reputation.
The beauty of preparation lies in its ability to become second nature. Over time, habits like creating backup plans, testing equipment early, and rehearsing until your delivery feels effortless will naturally become part of your routine. These small, deliberate steps create a strong foundation for consistently successful presentations.
Trust your preparation. Every polished slide and contingency plan brings you closer to delivering an impactful message. Step onto that stage with confidence, knowing you’ve done the work to succeed.
Your next presentation is more than just a chance to share information - it’s an opportunity to showcase your professionalism, knowledge, and ability to captivate an audience. Use this checklist as your guide, and make every moment count.
FAQs
How can I make sure my presentation meets my audience's needs?
To make your presentation truly connect with your audience, begin by getting to know them. Consider their demographics, what they care about, and the challenges they face. This insight will help you shape your content, tone, and examples to address their specific needs effectively.
Incorporate visuals and examples that feel relevant to their experiences. Adding interactive elements, like asking questions or using live polls, can encourage participation and keep them engaged. When your message aligns with what matters most to your audience, it becomes far more impactful and memorable.
How can I manage nerves and anxiety before giving a presentation?
Managing nerves before a presentation can be easier with a few simple techniques. Start with deep breathing exercises - taking slow, deliberate breaths can help ease physical tension and steady your mind. It’s a quick way to regain control when anxiety starts to creep in.
Another helpful approach is to reframe your nerves as excitement. Instead of viewing your adrenaline rush as fear, think of it as your body gearing up to perform at its best. This shift in perspective can turn nervous energy into something productive.
Preparation is your best ally. Go over your presentation several times until you’re comfortable with the material. If you can, visualize yourself delivering it confidently and successfully. This mental rehearsal can boost your self-assurance and reduce those pre-presentation jitters.
Lastly, try relaxation techniques like mindfulness meditation or progressive muscle relaxation to stay grounded. These methods can help lower stress levels and keep you focused. And remember, feeling a little nervous is completely natural - it’s a sign that you care. With the right preparation and mindset, you can transform that energy into a dynamic and engaging presentation.
What should I do if technical issues happen during my presentation?
If technical issues pop up during your presentation, the key is to stay composed and handle the situation with confidence. Let your audience know there's a minor hiccup and reassure them it will be sorted out soon. This approach helps you maintain a professional vibe and keeps your audience on your side.
Having a backup plan is a lifesaver. Consider bringing printed copies of your slides, saving your presentation on multiple devices, or preparing an offline version. Testing all your equipment ahead of time can also reduce the risk of last-minute surprises. A little preparation goes a long way in helping you adapt quickly and keep things running smoothly.